Showing posts with label Flowers. Show all posts

Wednesday, March 24, 2010

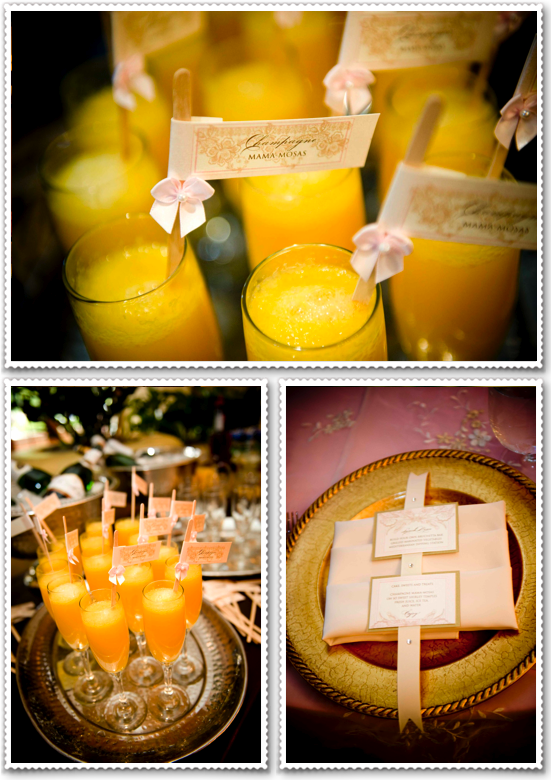
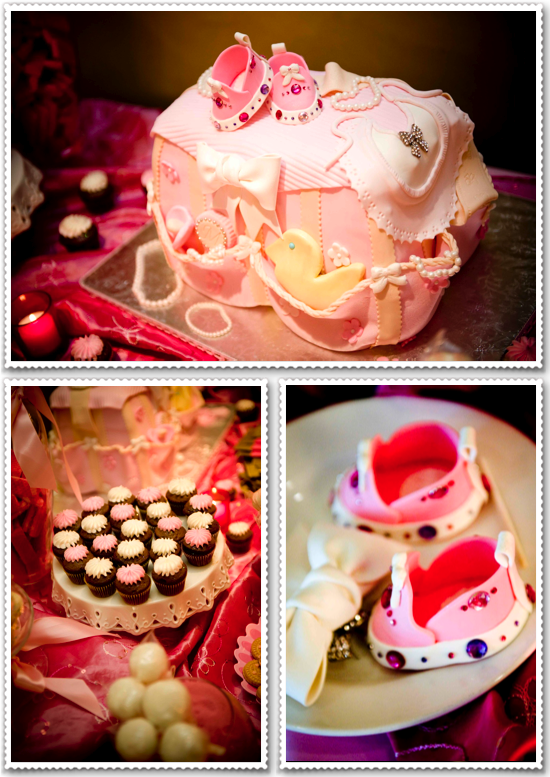
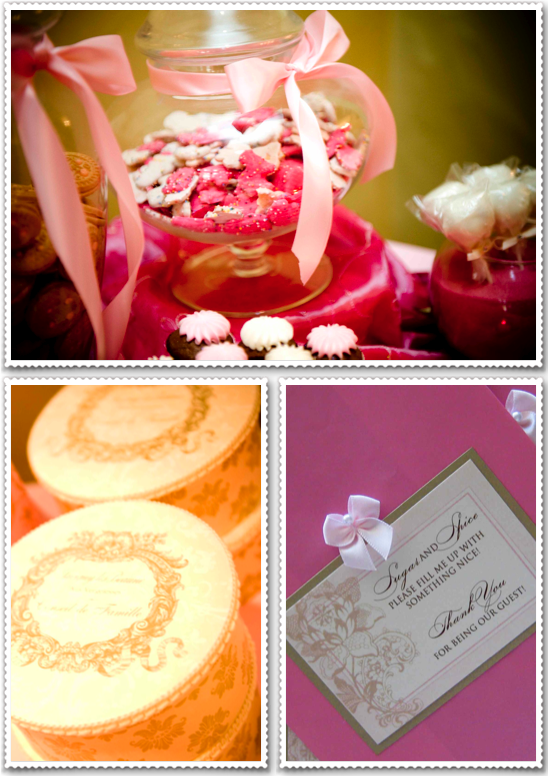
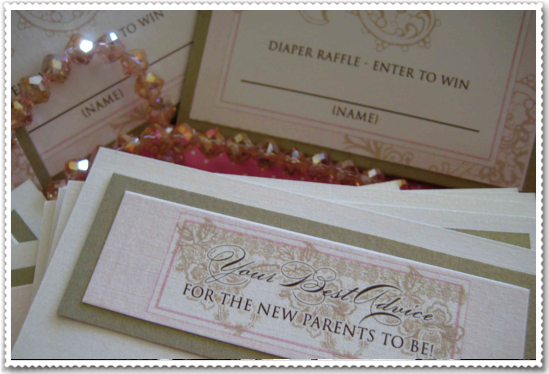
Champagne and Pink Baby Shower

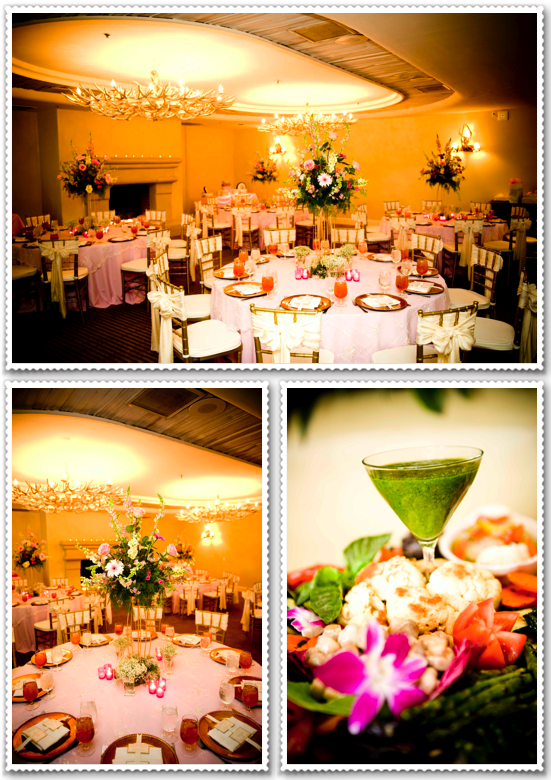
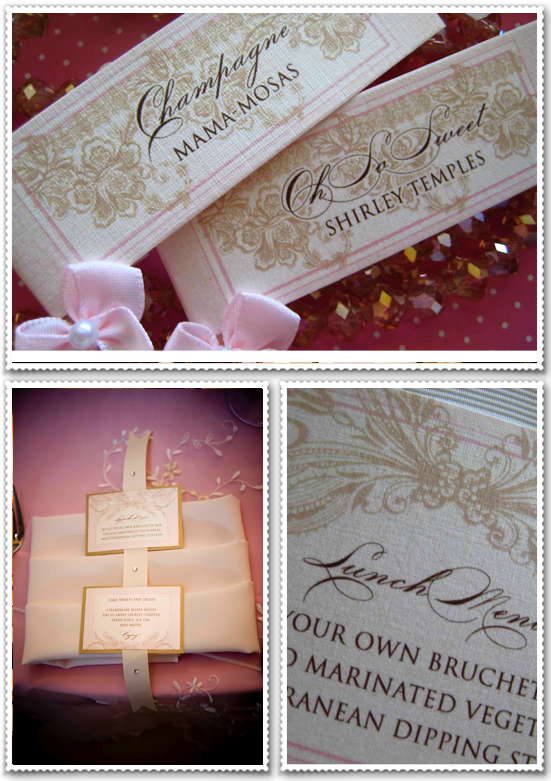
I thought I would include some more pictures of my above and beyond incredibly wonderful baby shower last month.  I just couldn't resist bragging a little about how wonderful it was to spend the day with my amazing family and friends!! :)
Picture 3

Picture 5

Picture 4

Picture 6

Picture 7

Picture 8

Picture 9

And once again - photography by the uber talented Shelly Ivy from Ivy Studios!

Tuesday, February 9, 2010

{Paper Love Crafts} Sweet Pea Planter

Sweet Pea Planter
Sweet Pea Planter

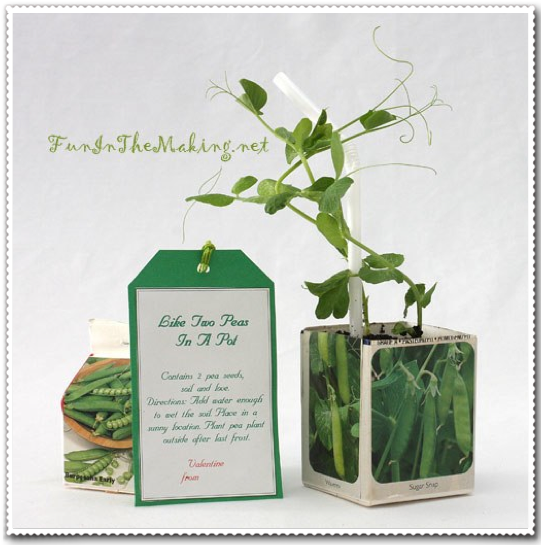
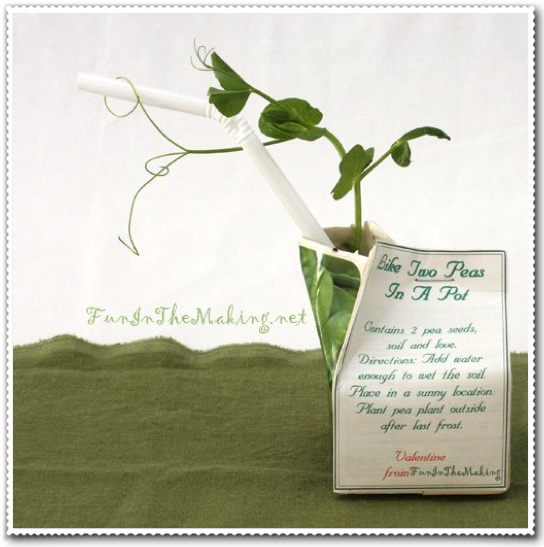
Here is a child’s Valentine gift that does not include candy.
(found on funinthemaking.net)


Isn't this absolutely adorable?! I would love for one to sit in my window at home just getting some nice afternoon sunshine. What a great way to reuse those funny milk or orange juice boxes.   I even love how the little straw was used to hold up the little plant.  Sooo clever!!

Is there a trick to opening these boxes right?  Even as a child, I could never get them to open all pretty.

How To:

Collect empty milk or juice cartons; the kind kids get at school with their lunches. Then wash them out.

Cut out pictures of pea plants from old seed catalogs and paste them onto the outside of the milk carton/pot.

Add dry potting soil and drop in two pea seeds. Alternatively you can place the pea seeds in a mini envelope/ Valentine card.

Staple the top closed.

Save straws (optional) if doing this project for home. Don’t waste a new straw; reuse a straw that would otherwise be on its way to a landfill. The straw becomes a support as the pea plant grows taller.

Print Valentines or design your own.

Valentines for juice cartons

Valentines for milk cartons or seed envelopes

Thank you - http://www.funinthemaking.net/category/valentines-day/ - for this absolutely adorable project!

Sunday, February 7, 2010

{Paper Love Crafts} Cute Paper Flowers

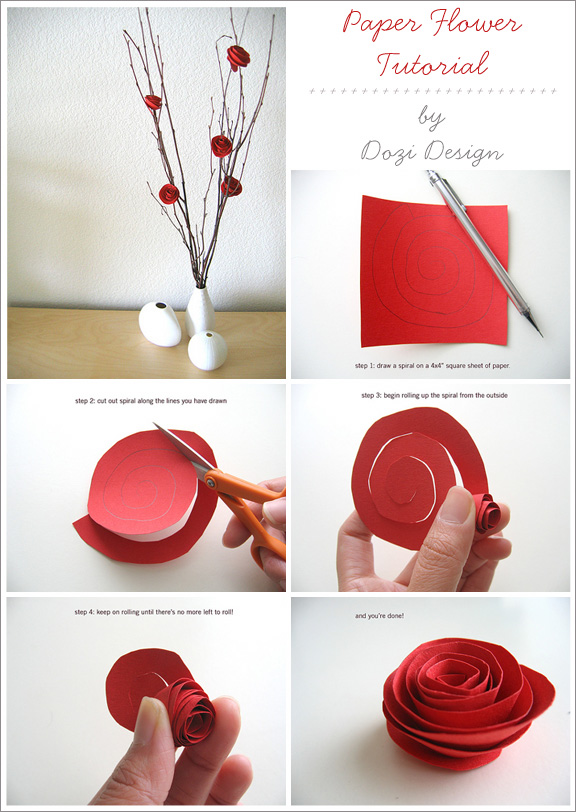
Super Cute Paper Flowers

{DETAILS}

1. Draw a spiral on a 4x4" square sheet of paper
2. Cut out spiral along the lines you have drawn
3. Begin rolling up the spiral from the outside
4. Keep on rolling until there is no more left to roll
5. You're done.


Monday, November 23, 2009

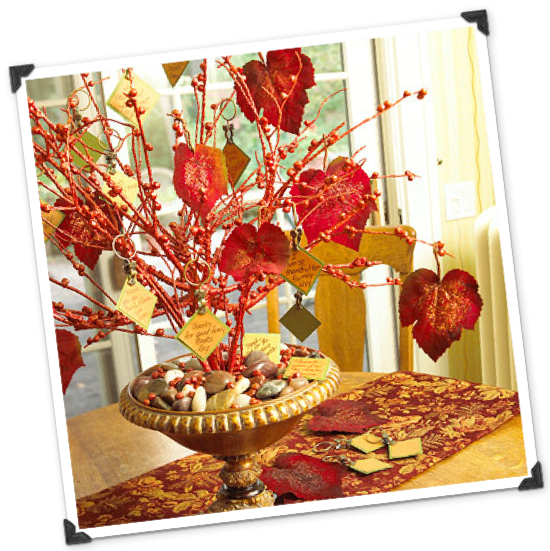
{Holiday Entertaining} Tree of Thanks

Picture 2

What you need:
  • Tree branch
  • Handheld hedge clippers
  • Butter tub
  • Cement
  • Water
  • Disposable container
  • Hot-glue gun and glue sticks
  • Chickpeas or dried beans
  • Spray primer
  • Orange spray paint
  • Clear spray sealer
  • Orange glitter
  • Scissors
  • Decorative container
  • Decorative rocks and silk leaves
  • Papers in green and gold
  • Paper trimmer
  • Glue
  • Marking pen
  • Shower curtain clips

How to Make It:

Trim a dry dead branch to the desired size and shape using hedge clippers. If needed, combine several small branches.

Choose a container, such as a butter tub, that can be hidden in a decorative container and filled with cement.

Following the instructions on the cement package, mix cement in a separate disposable container. Pour the cement into the butter tub.

Insert the branch base into the center of the cement-filled tub. Tap the sides of the tub until the branch sits firmly in cement. Allow cement to dry.

Use a hot-glue gun to adhere chickpeas or dried beans randomly to the branch, using as many as desired.

In an outdoor area, spray the branch with primer. Spread extra chickpeas on newspaper and spray them with primer. Let the primer dry.

Spray-paint the branch and chickpeas with orange; let dry.

Spray one section at a time with clear sealer. Quickly sprinkle orange glitter onto wet sealer; let dry. Repeat this process until entire branch and chickpeas are glittered. Place the weighted tree into decorative container.

Place decorative rocks around the branch base until the cement is covered. Sprinkle extra chickpeas onto the rocks.

Trim silk leaves from stems. Coil the wired ends and hang on the tree.

Trim 2-inch squares of green paper and 13D4-inch squares of gold paper. Center and glue the gold paper onto the green paper. Ask family members to use a marking pen to write meaningful messages on the squares. Use shower curtain clips to hang the messages from the branches.

Leave extra colored squares around the tree base for guests to add more messages to the tree.

Thank you Better Homes and Garden for this wonderful idea!

Saturday, October 3, 2009

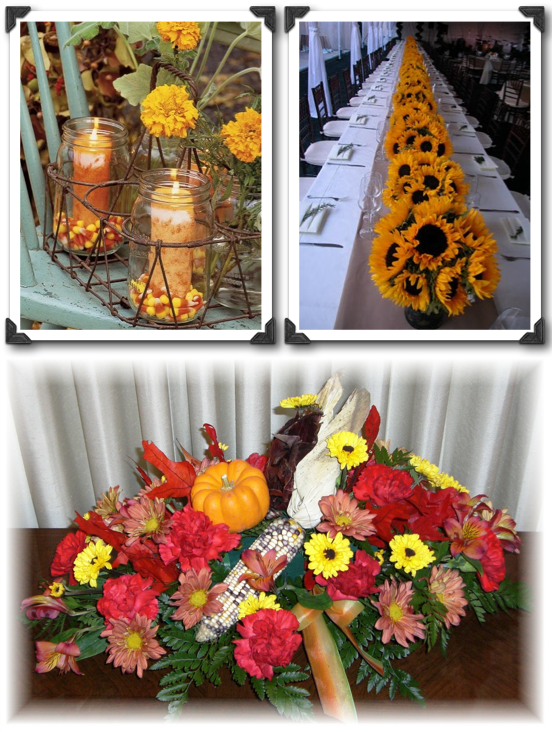
{Pro in the Know} Seasonal Fall Flowers


When you trying to figure out the flowers you want for your next event, it's often helpful to consider which flowers are in season.  They either may not be available or if they are, they will be way more expensive.  Plus, you can also create a look or feel once you know what is available to you.
Picture 4
Autumn is the season of the primary harvest. Autumn falls during september - november in the Northern hemisphere, and during september - november in the Southern hemisphere.Crops are harvested during Autumn. Leaves change color are at their beautiful best.

Flowers Blooming in Autumn are:
Acashia, Allium, Alstromeria, Amaranthus, Anemone
Baby's Breath, Bittersweet
Carnation, China berry, Chrysanthemum, Cockscomb, Cosmos
Echinops
Freesia
Gerbera Daisy, Gladiolus, Gloriosa
Hypericum
Iris
Juniper
Kangaroo paw
Kalancheo
Liatrus, Lily, Asiatic Lily
Misty Blue
Orchid
Pepper berry, Protea
Queen Ann's Lace, Quince
Rover, Roses, Rowen berry
Salvia, Solidago, Statice, Star of Bethlehem, Sunflower
Yarrow
Zinnia

Information provided by www.theFlowerExpert.com

Monday, August 24, 2009

Haute & Tantalizing 3D Tablescape | Modern Autumn

Picture 4


Picture 1


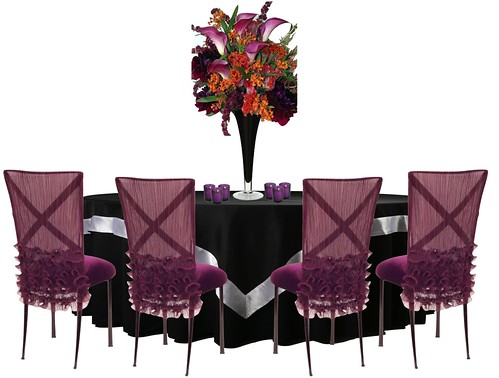
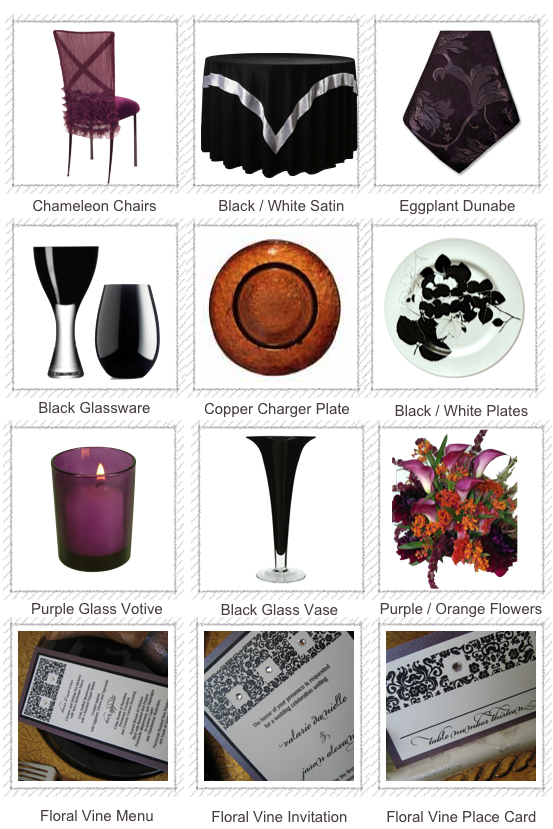
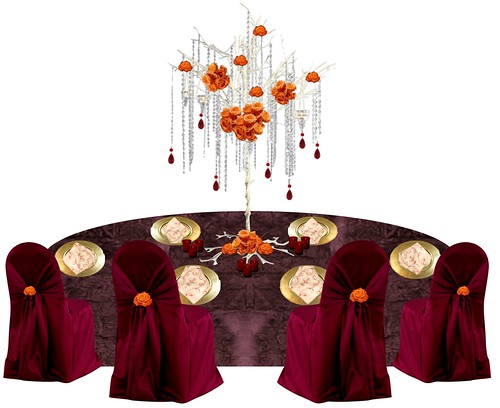
This tablescape is a beautiful mixture of modern meets autumn. Yes, fall is quickly approaching, which so happens to be my favorite time of the year. With fall comes wonderful parties celebrating many occasions. This year, I want a fall table that is a bit more modern than the traditional coppers, browns, deep purples, so I created a concept utilizing beautiful black elements such a black and white satin linens and black glassware including the centerpieces and wine glasses. The centerpiece brings in the eye candy colors of plums and copper flowers, while the copper chargers tie it all nicely together. The floral vine invitation and stationery carries on the same floral element as the dinner plates.

Monday, August 17, 2009

Haute & Tantalizing 3D Tablescape | Garden Whimsey

Picture 4


Picture 5


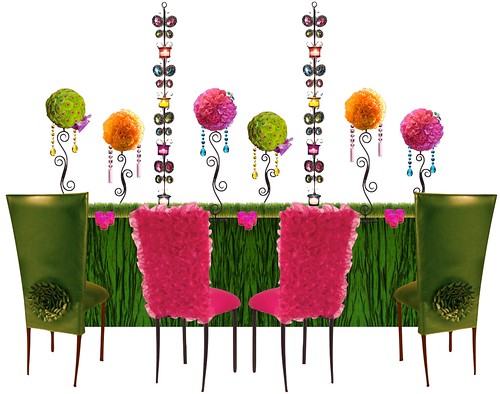
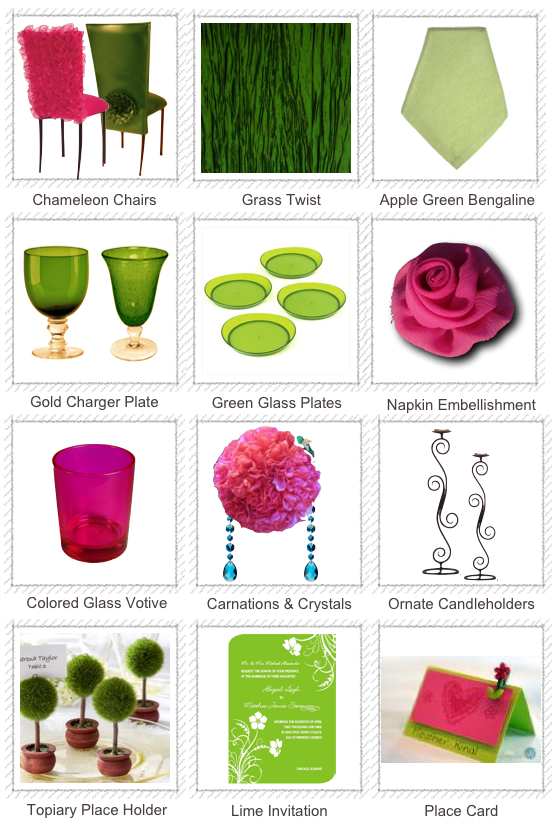
Hosting a fun and whimsical garden theme party? This tablescape will be perfect for you. Invite your guests to your garden bash with beautiful lime and floral inspired invitations.


Create a beautiful centerpiece with carnation pomanders, drizzling crystals, and swirly candleholders sitting atop a bed of wheat grass. Your guests will enjoy the texture of the luxurious grasslike green linens. Personalize clear green plates with these adorable topiary name holders. And don't forget the oh so chic chameleon chairs that are sure to bring a smile to anyones face.
Wednesday, August 12, 2009

Haute & Tantalizing 3D Tablescape | Christmas Pine

Picture 3
Picture 4

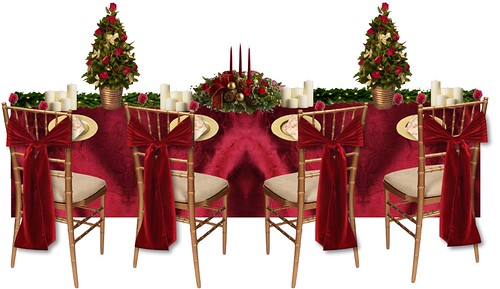
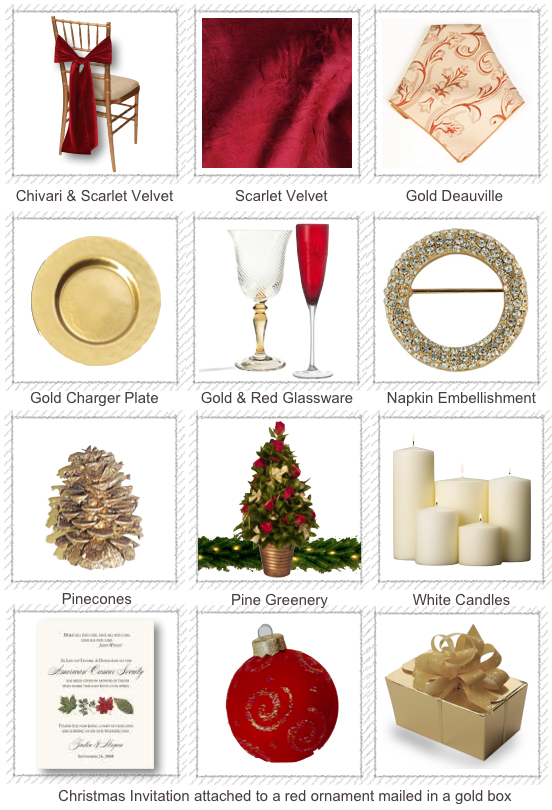
We are actually really excited about this tablescape because we get to bring it to life come this December. One of our clients came to us in search of the perfect decor for her Christmas wedding. Her mandatory element was that we used pine that carried a very strong smell. So we designed this gorgeous kings table for her that brought in the natural pine trees through a long table garland and the various centerpieces. She also wanted it to feel very rich and elegant and that's where we brought in the gold elements like the chivari chairs, gold boxes, gold brooch napkin enhancements, and gold dinnerware. The deep red velvet linens will be exquisite to the touch and the candles will add romance to their evening. To start off this entire celebration, guests will receive gold boxes in the mail with a beautiful red ornament and letterpress invitation enclosed with a small twig of pine.

Watch for this post coming early next year as we showcase this glamorous Christmas wedding. You may even see snow, a hot cocoa bar, and many more surprise elements! (Snow is a big deal to us Phoenicians! LOL)

Tuesday, August 11, 2009

Haute & Tantalizing 3D Tablescape | Charcoal Trend

Picture 4

Picture 5

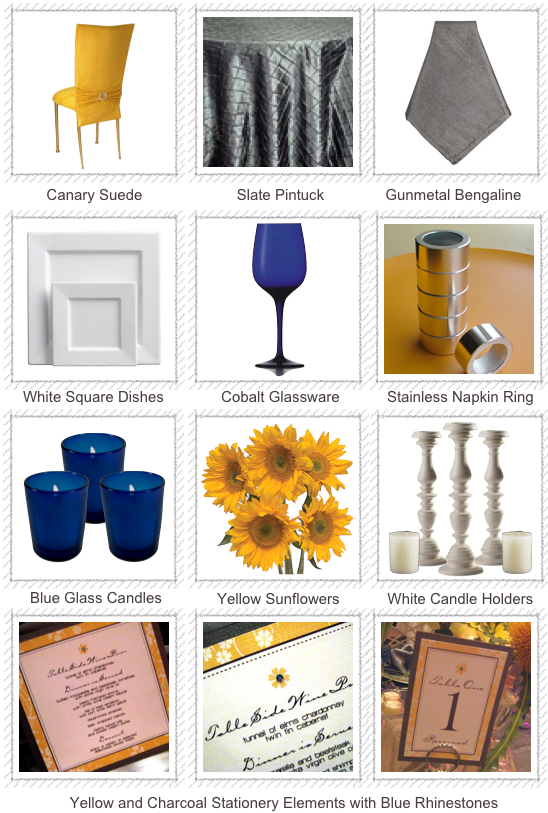
Charcoal and golden yellow bring the spin on the perfect modern celebration. It's hip, it's vibrant, and it's oh so modern! Tablescape your table with silver pintuck linens, white square china, blue cobalt glassware, and stainless napkin rings. Set your centerpiece with single yellow flowers of one kind like sunflowers, yellow carnations, or even tulips. Or use multiple yellow buds. Make a dramatic statement with matching yellow and grey metallic menu cards, invitations, and table numbers or place cards.
Tuesday, August 4, 2009

Haute & Tantalizing 3D Tablescape | Rustic Elegance

Picture 2
Picture 1
If there is one thing we love to do with our clients, it's to bring their thoughts and visions to life. Often times it's a challenge to sit down and pull everything from their minds and get it into raw, touchable form. But once you figure it out, it's a very rewarding challenge that we absolutely thrive off of.

However, in return, we are very creative visionaries ourselves with tend setting, creative, and innovative design concepts that live deep in mental libraries. Many times we can tell our visions to clients and the look on their face is priceless .... on one hand they have no clue what we just said, but on the other hand they are absolutely excited and love what we just said.

So we have to do is pull from within our minds to put them out onto paper and we do that through a simple 3D photo-realistic rendering. It's not always perfect and never the exact product, but it gives people a vision to enhance upon so they can give their feedback (good or bad). The end product comes out absolutely amazing because together our ideas, thoughts, likes and dislikes come together cohesively.

3D mock-ups are inspiring --- and you will get to spend this entire month watching many of them come to life through our "Haute & Tantalizing 3D Tablescape" series! Enjoy :)

Friday, July 24, 2009

EE Celebration | Tuscan Wedding {part 2}

Picture 1

Picture 6

Picture 2

Picture 3

Picture 7

Picture 4


A Very Talented Vendor Team:


Photography -
One Fine Day 


Venue -
Villa Siena


Planner -
Meant2Be Events


Stationery / Details -
The Event Essentials


Entertainment -
SKM Entertainment


Flowers:
Blume Events


Cake:
Piece of Cake


Linens:
BBJ Linen

Thursday, July 23, 2009

EE Celebration | Tuscan Wedding {part 1}

Picture 1


Picture 4


Picture 3

Picture 5

Picture 6


Picture 2


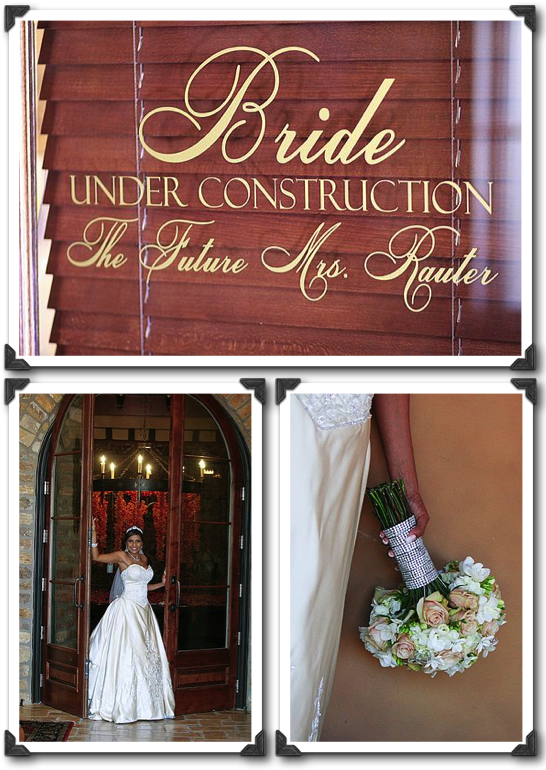
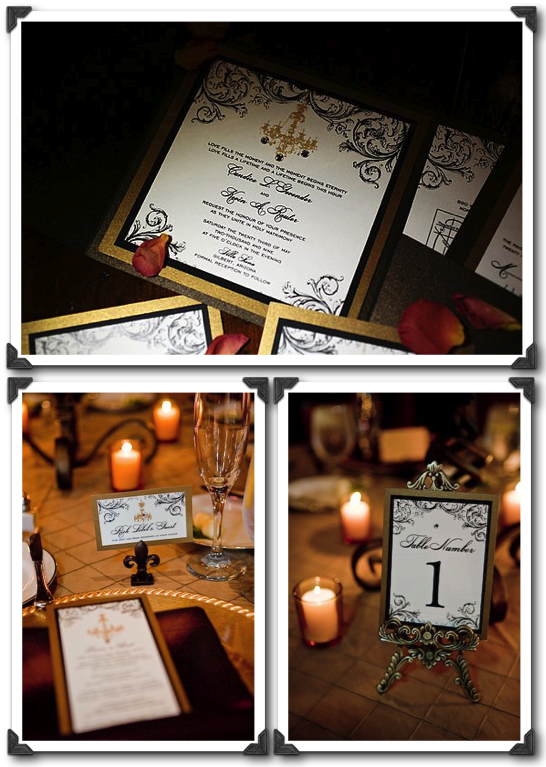
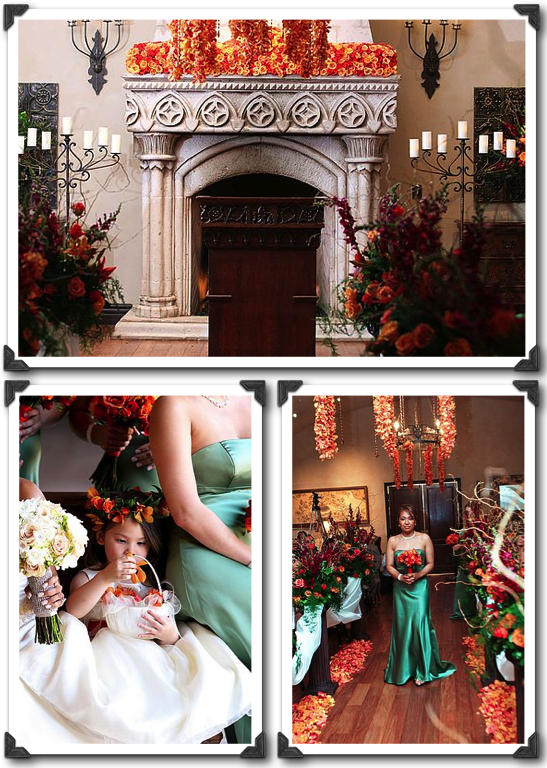
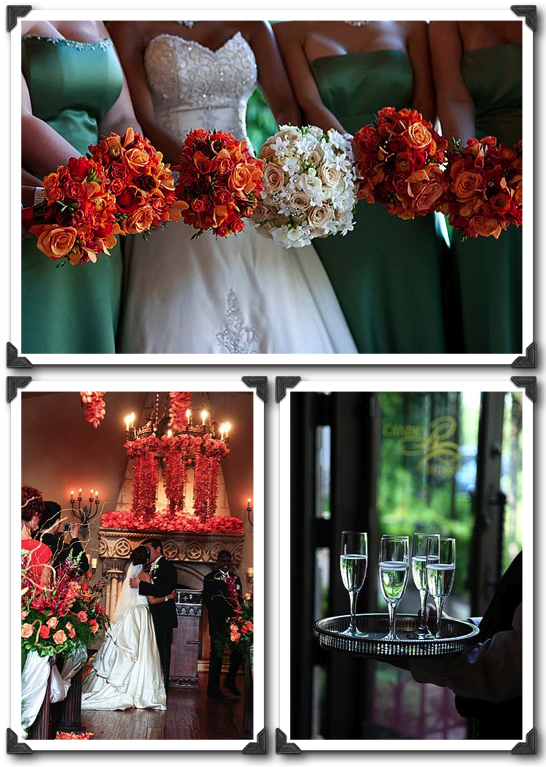
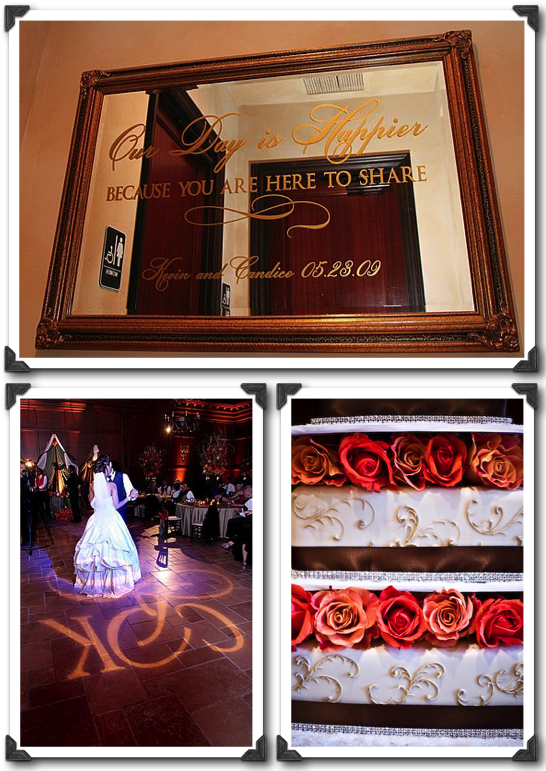
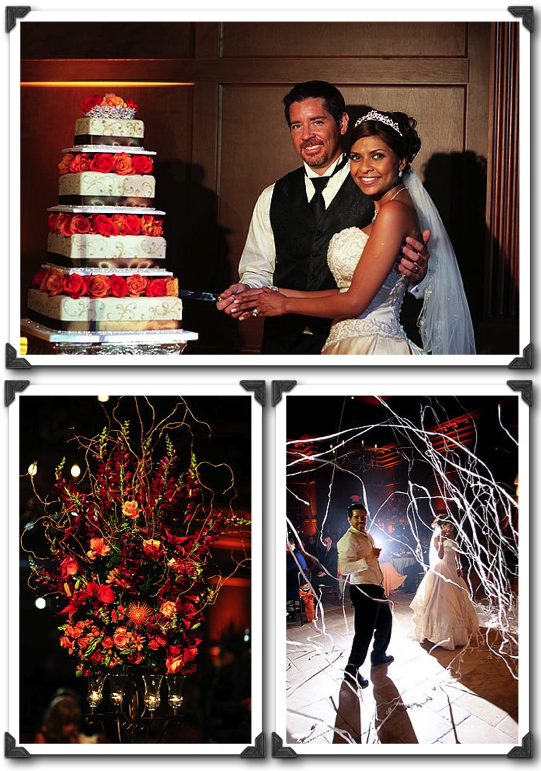
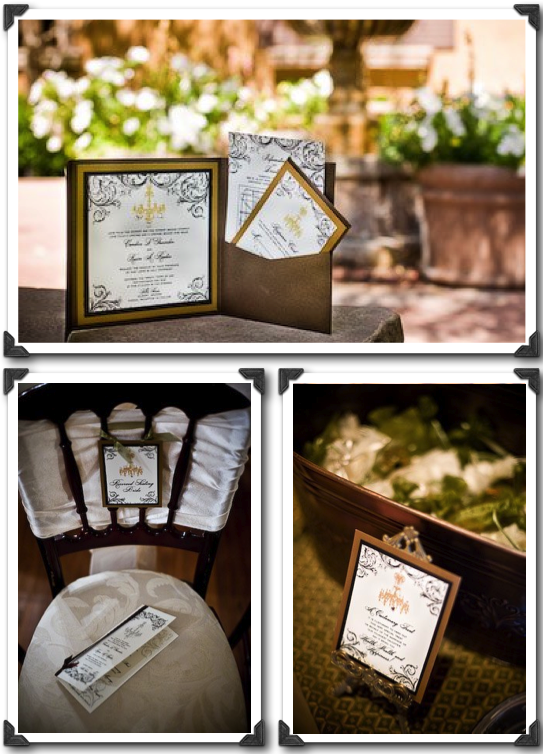
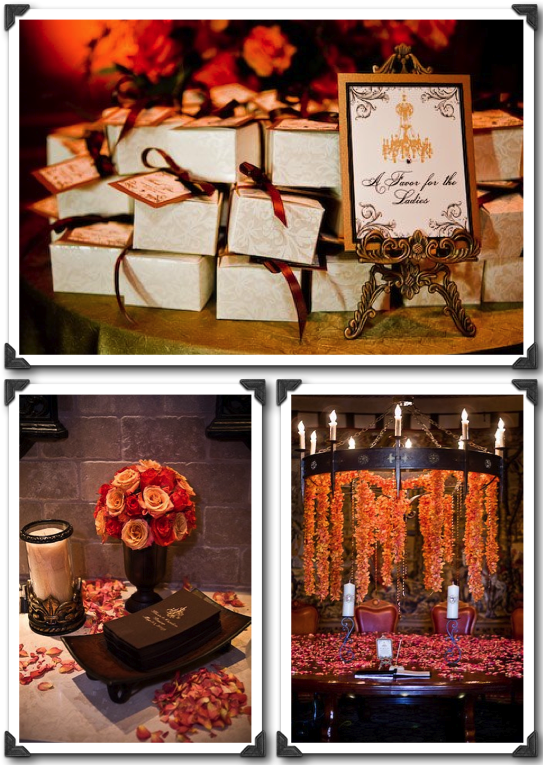
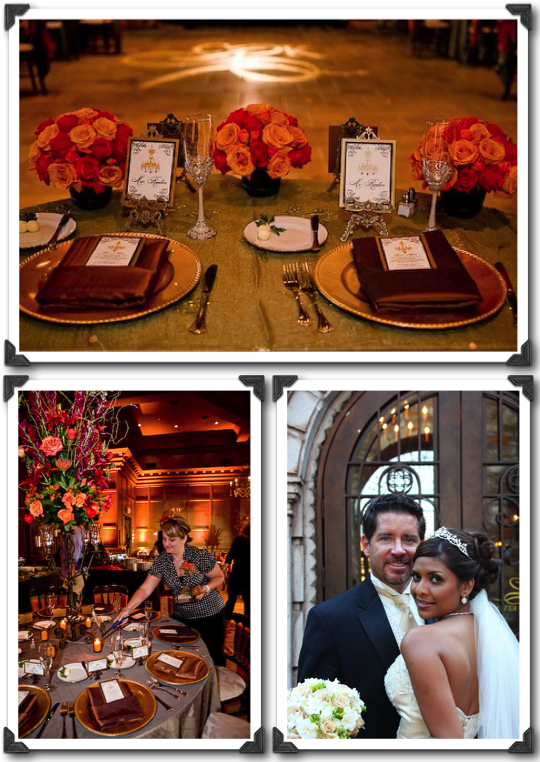
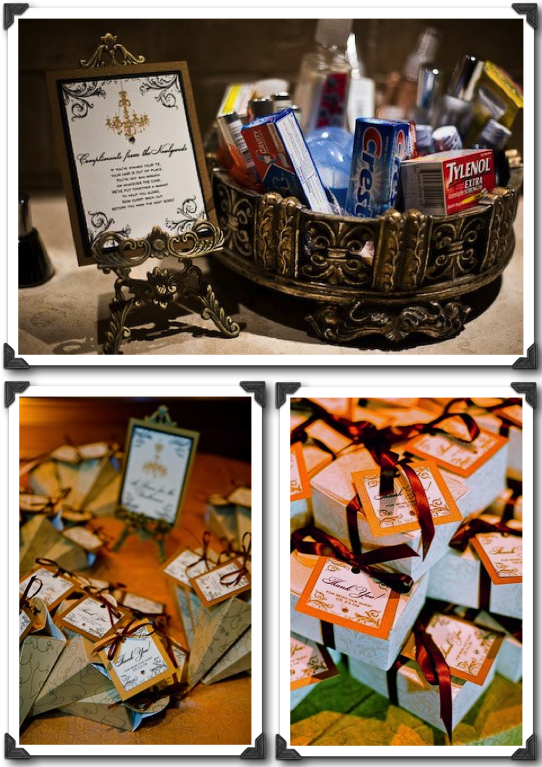
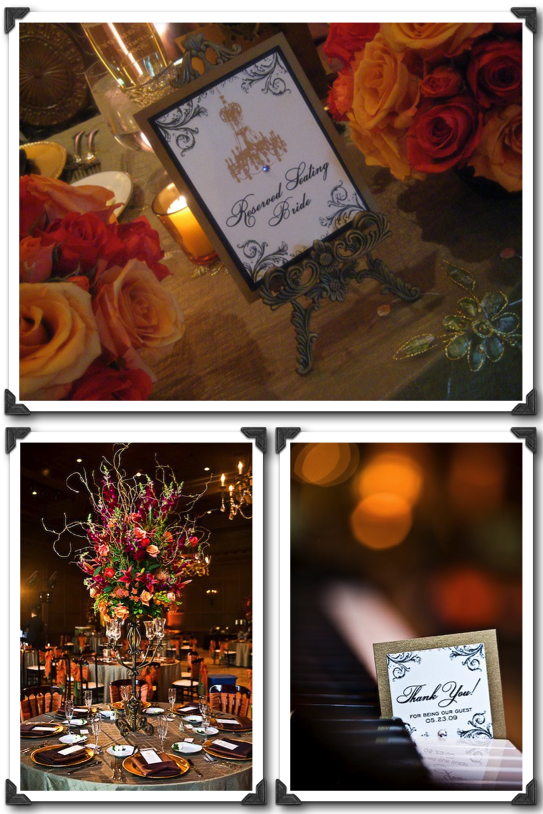
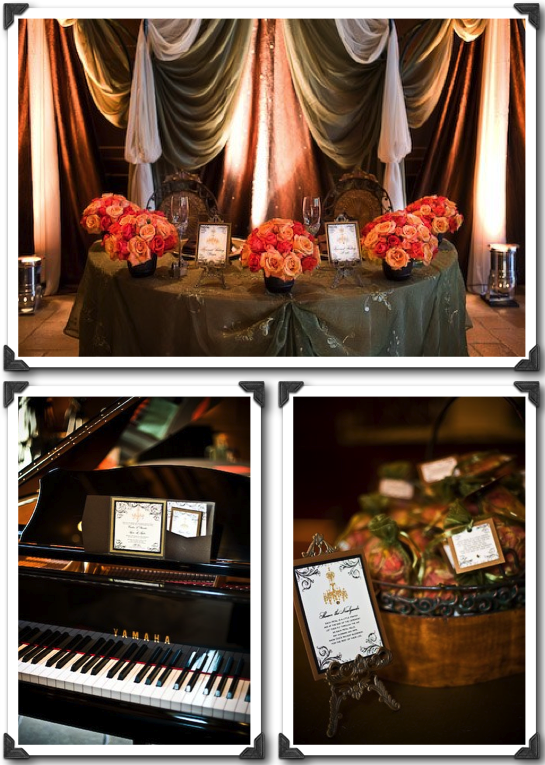
Back in May, I was truly honored to be share collaborative design talents along side of a wonderful friend and very gifted planner, Regina from Meant2Be Events.  For this elegant and regal wedding, the bride, Candice, was very much into personalizing her details to showcase their personality as a couple. (So many details, it will take 2 days of posts) Nothing was left untouched or didn't go unnoticed.  At times, I even caught guests making comments about their excitement to see what element will come to life next.  It was a very warm, inviting, and eye appealing celebration filled with an over abundance of love (and rhinestones!) Candice and Kevin didn't stop smiling, laughing, dancing, and kissing all night.  As a vendor, it was a magical experience that will never be forgotten and their pure happiness was very contagious!  


Until tomorrow ... there will be more beautiful shots of this glamorous couple, their orchid chandelier ceremony, choreographed confetti filled first dance, blinged out cake, and more ... stay tuned!!
Tuesday, July 14, 2009

EE Celebration | Posh Pink Wedding


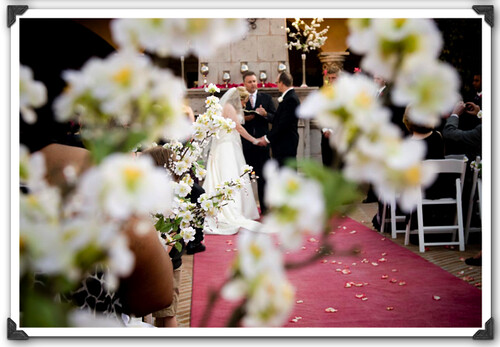
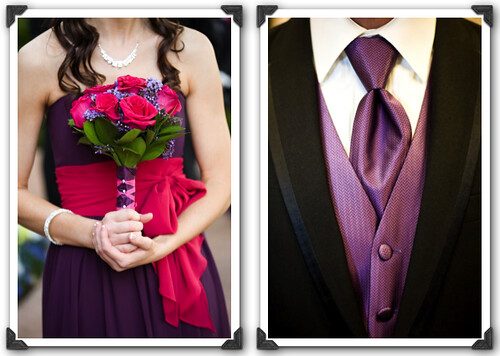
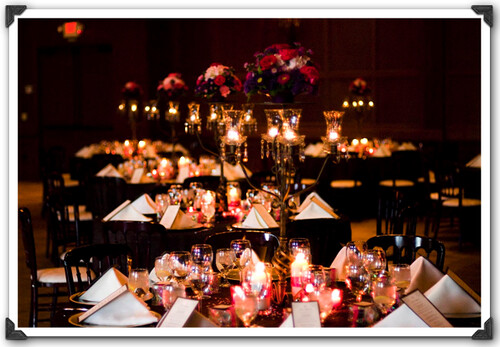
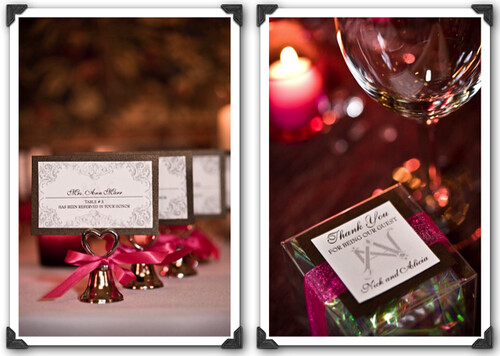
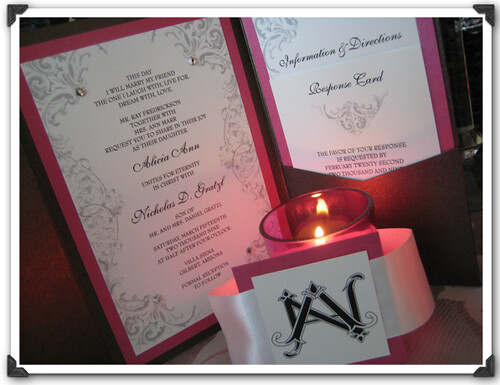
Often times I am asked what came of the couple whose engagement was caught on film. You can catch me in a reply that they truly had their perfect wedding that she had dreamed of for years, and now I have pictures to prove it.  Congratulations Alicia and Nick!!  Your affair was amazing, elegant, and sincerely filled with many tears of joy.  I am forever thankful to be a part of your love filled affair and will forever treasure the memories -- and look forward to many more!! Can't wait to celebrate with your brand new home that you get to move into tomorrow!

For those of you who would like to revisit the engagement story - click here!

Picture 12

Picture 2
Picture 6

Picture 1


Picture 4

Picture 13

Picture 5

Picture 11

Picture 10

Picture 7


Photography by the very talented Shelly Ivy Studios team

and family photographer friends - Bret Siegel and Lis Thurston 

Wednesday, October 22, 2008

{DIY: K is for Kissing Balls a.k.a. Pomanders}

pom
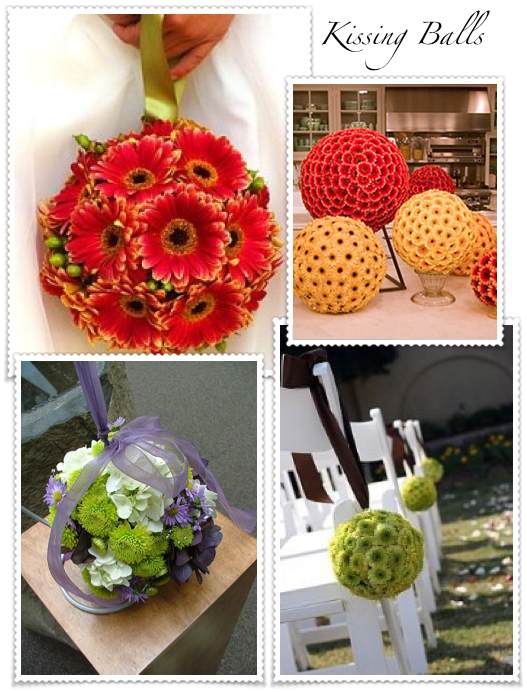
Use these wonderful balls for decorating, as bouquets or favors. Easy and inexpensive to make. Try using dahlias or carnations for a different look. The trick is get the flowers as close together as possible when you are placing them into the ball. Use fresh or silk flowers.

Supplies:

Styrofoam Ball
2 dozen stems of silk rose buds
Low Temp Glue Gun and Glue Sticks
Ribbon

Directions for making with silk flowers:

Pull the roses off the stems or use a wire cutter to remove -leaving a 1/4" on each. Using a toothpick make a hole in the Styrofoam ball for each rose bud you are attaching. Then fill with a dot of hot glue - place the rose in hole. Let dry. Continue adding roses until the ball is filled.
You can insert a few leaves between the roses for added color.

Directions for fresh flowers

You will doing the same as above but instead of a Styrofoam ball use an Oasis foam ball for fresh flowers. Also instead of using hot glue to hold your flowers in place use greening pins instead.

To make a handle

If you want to carry your rose ball you can easily make a handle. Use ribbons or jute. Measure desired length x 2 and add 3 inches for the knot. Tie into a loop (double knot). Hold in place with greening pin. Then hot glue another greening pin over the top.

Or prior to starting with your flowers, take a long stitch needed and pierce it through the center of the foam ball with a ribbon attached.  Make a big knot at one end and let some ribbon hang.  You now have a very sturdy handle.

{Kim's Food for Thought}

Drizzle a few dangling crystals from the bottom of the ball to give it some glamour.

Add pearl pins or rhinestones to the center of the flowers to give it sparkle.

Make three small ones and hang them on a continuous row.

Instructions provide by Save-On-Crafts.com

Tuesday, September 23, 2008

{Sweet Revenge! I've Been Sabotaged}

Picture 6
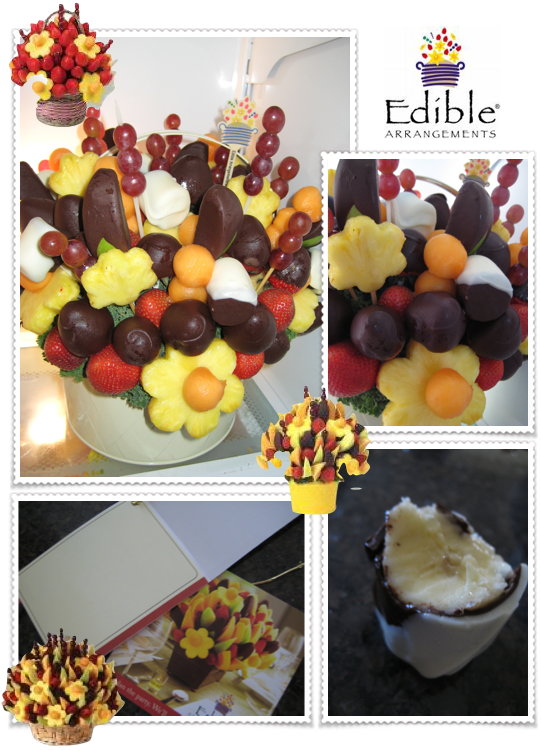
 It's 3:30 in the afternoon and my doorbell mysteriously rings.  Since my office faces the street, I can always see who is coming and going, and 99.9% of the time during the middle of the day, it's the UPS or FEDEX guy with boxes of paper for me.  However, today was different.  Doorbell rings and I get this puzzled look on my face.  I'm a ways out from the city for my friends to just drop by, my mom and auntie are out looking at houses today, and my husband is at work.  So to my surprise there is this teeny tiny lady standing there with this huge Edible Arrangement asking if I was Kim!  "YES! YES! That's me!!"  I sign the slip and anxiously rip open the packaging to read the note.  But another mystery appears -- there is a BLANK note card attached.  OK -- who is sabotaging my diet?!?!? THANK YOU!! THANK YOU!! THANK YOU!! What a fantastic surprise!! (I bit into the chocolate covered banana first and fell in LOVE!)
Picture 5
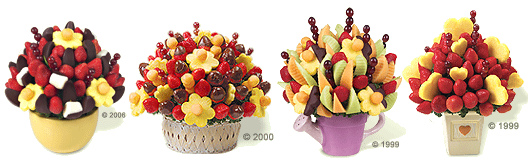
Edible Arrangements® has a fresh fruit bouquet to make any occasion special - from birthdays, anniversaries and congratulations to business events and client gifts. Our bouquets are made fresh with premium fruit arranged in a variety of stunning displays. Customers can visit one of our 857 stores worldwide, order online or via phone. Each bouquet can be complemented with chocolate dipped fruit including dipped strawberries, dipped pineapple daisies, dipped banana slices, dipped Granny Smith apple wedges and more! Make every occasion special with Edible Arrangements®

Wednesday, September 3, 2008

{The Clay Bouquet}

Picture 3
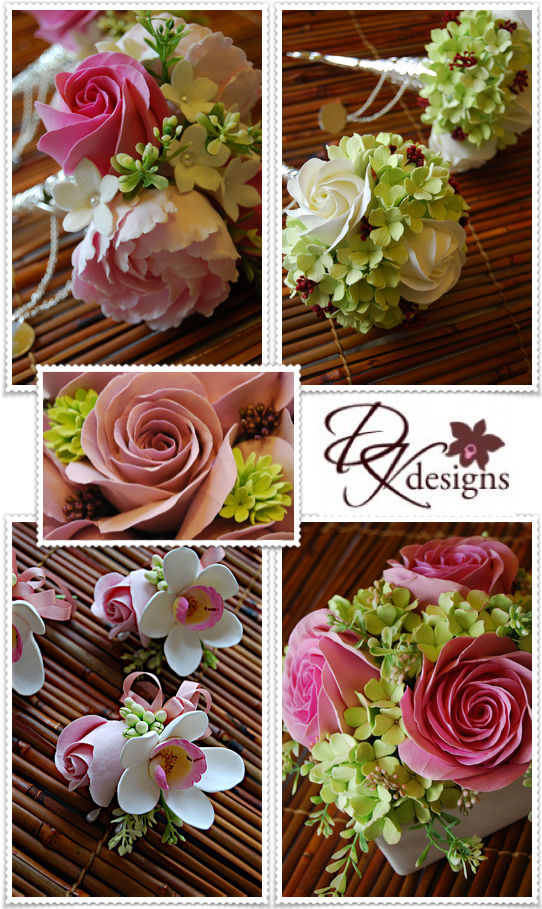
When I stumbled across these glamorous beauties, I couldn't help but kiss my screen. Diane at DK Designs has created a unique, one of a kind product that is absolutely stunning!!  The detail alone blows me away.  Where was she when I was getting married, because I would have FOR SURE carried one of these amazing creations down the aisle.

Flowers make your wedding day uniquely your own, giving the day and festivities added personality and highlight the beautiful occasion that is being celebrated. A new trend in wedding floral design has been gaining popularity in recent years - clay flowers. The flowers are made with CLAYCRAFT™ by DECO© Soft Clay (formerly DECOMAGIC Soft Clay). This particular type of air-dry, lightweight clay brings out the lifelike quality of fresh flowers, but last a lot longer than fresh flowers. Because they are so lightweight and realistic, they are a great alternative to real flowers.

Clay floral creations are a great keepsake and last well beyond the bride and groom's wedding day. As is traditional with most brides, they purchase a fresh flower bouquet and preserve it only to discover that a few years down the road, the colors have turned brown and the bouquet looks like dried flowers. Clay flower bouquets will look as vibrant as the day you say "I do" for many years to come.

Tuesday, August 5, 2008

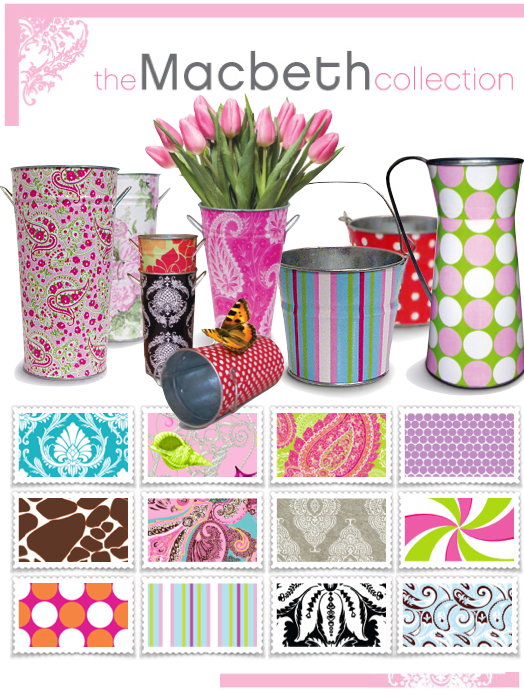
Picture 4
With an infectious sense of fashion and need to steer the lackluster home accessories category in a new direction, Margaret Josephs launched The MacBeth Collection with an opening mantra of Decorate your life. The seven-year-old home & accessories line marries together functional home storage and organization with high-design to make decorative living essential. After triple-digit growth and distribution in more than 3,500 stores nation-wide, The MacBeth Collection has spread its custom-designed creations to almost every home product and accessory including: storage bins, baby pails, picture frames, flower vases, umbrella holders, clip boards, etc. – all with the mission of transforming the mundane into a stylish expression of personal style.

What fabulous style and the best part, you get to choose!! These adorable containers would be perfect for the next bridal shower or garden event. Best of all ----- I see a matching invitation design swirling in my head!!!! Silly designer, always thinking about the next cool invitation!! ;)

Sunday, July 13, 2008

{Chandelier Centerpiece with Scott Corridan}


As a culture that knows how to celebrate, we love our inspired tabletop designs. Tabletop designs have become a popular competition angle for many professional event organizations, charities, design groups and the like. NACE, the National Association of Catering Executives, a nationally based professional organization dedicated to networking for professionals in the special events industry while building educational opportunities, hosted its 2nd annual Elements Competition at the JW Marriot Desert Ridge on Monday, June 30th. While the temperatures soared above 110 F outside, the attitude inside the competition space was very cool, ultimately hip, and super inspirational!

Nationally acclaimed event producer Scott Corridan was the event's celebrity judge, and with his 15 years of experience and exacting eye to detail and what inspires us to celebrate at our utmost best, he offered the group of 35 contestants some valuable insights. (read the rest of the story on SonoranLiving.com HERE)

We were greatly honored for Scott to have chosen our pieces from our tablescapes to showcase on this segment. Check out this video to see him cover some great facts about event planning and view some fun pieces from the competition.

The beautiful glass flower creations that artist Scott Johnson from Jade Glass created.

To participate in future NACE events and to become a member of the Phoenix NACE chapter, please visit www.phoenixnace.com.

For more inspiring tips on table design and the luxury lifestyle world of Scott Corridan, please visit www.CorridanandCo.com.

Scott is also President and Creative Director of White Chocolate Label wedding gowns. For more information, visit www.WhiteChocolateLabel.com.

Thursday, May 29, 2008

{10 Tips to Plan an Eco-Friendly Wedding}

1.) Setting the Tone
Set the tone of your green wedding by choosing an eco-friendly location. If an outdoor wedding is up your alley, choose a location that will show off the beauty of the environment. If you prefer an indoor location, check out local museums or art galleries that will donate your deposit to a good cause.

2.) Choose Eco-Friendly Rings
When it comes to choosing a ring, make sure to use jewelers that are green-friendly. More and more, jewelers are using recycled gold and fair-labor gemstones. To make sure you are not purchasing a "blood diamond," ask your jeweler about the origin of the stone.

3.) Use Local Vendors
Choosing area vendors is a great way to keep the transportation emissions low and support your local economy. If you are interested in using a green wedding planner, check your local listings -- they're popping up all over the country.

4.) Re-Use a Wedding Dress
Though your wedding dress may be your most treasured item of your wedding, there are many ways you can be eco-friendly when it comes to choosing a dress. First is the age-old tradition of wearing your mother or grandmother's dress. Take it to a local seamstress to transform it into your own special dress. If you can't imaging wearing your mom's gown, check out charities such as Brides Against Breast Cancer, where you can buy or donate a dress. All proceeds go to support women with breast cancer.

5.) Photography: Go Digital
Even though most photographers are using digital cameras, it's a must for a green wedding. Digital photos don't use the harsh chemicals, wasted paper, and rolls of film that film photography does. Another plus is you get to choose exactly what images you want printed. Ask your photographer if they allow you to keep the digital images after the wedding is complete, then you can save a digital album of your big day

6.) Use Recycled Paper
Using recycled paper is an easy way to create green invitations or programs. Ask your vendors if they can print on recycled paper or recycle the leftover scraps. We love the eco-friendly invitations of Tasha Rae Designs. Her theory: "Who said recycled invitations can't be beautiful?" Her invites are just that, beautiful! For an alternative to cut back on paper, create a wedding Web site where your guests can print off directions, reply, and find out hotel information.

7.) Home-Grown Flowers
For your flowers, choose a local organic florist to arrange your centerpieces and bouquets. For a summer wedding, use farmers' market finds to create bouquet and table arrangements, or use potted plants which can be given away to your attendants at the end of your big day.

8.) Choose an Organic Menu
Ask your caterers if they can provide vegetarian and organic entrees. Also consider what you are dining on. If your location doesn't provide dishes, consider renting them to avoid using disposable plates.

9.) Favors
Instead of favors, let your guests know that you have donated a specified amount per guest toward your favorite environmental organization. Check out www.idofoundation.org, where you can register to raise money for your favorite organization.

10.) A Green Honeymoon
When you're planning your honeymoon, keep in mind the practice of ecotourism, which is defined by The International Ecotourism Society as "responsible travel to natural areas that conserves the environment and improves the well-being of local people." Check out their Web site for ideas and sources to plan an eco-friendly honeymoon.

10 Tips to Plan an Eco-Friendly Wedding - article found on BHG.com

Monday, May 12, 2008

{Martha Stewart - Cupcake Paper Carnations}

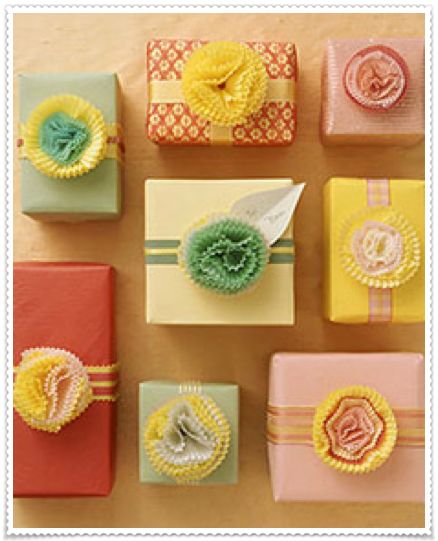
Picture 1
Baking liners make sweet gift toppers for Mother's Day, or anytime. Nesting pastel papers in different sizes -- petit four, mini muffin, and cupcake -- creates fluffy blooms that will add a flourish to beribboned presents. You'll find liners in the baking section of grocery stores and housewares stores. Combine a bunch, then secure with a brass fastener.

Cupcake-Paper Carnations How-To
Use up to a dozen liners for each flower. (The more liners you use, the fluffier the results.)

1. Separate and set out liners.

2. Fold them in half.

3. Nest folded liners inside one another. (If using a variety of sizes, stack from largest to smallest.) With an awl, poke a hole in the center near the folds.

4. Send the stem of a mini brass brad through the hole. Pierce an unfolded cup with the brad. Spread brad to secure. Fan out liners to create ruffles.

5. Rotate each folded liner about a quarter turn, and overlap each one with the next until you've formed a flower shape. Hot-glue the liners directly to a gift or ribbon.

MarthStewart.com First Published: May 2005

Search This Blog

Followers

Blog Archive

  © The Event Essentials | Designers of Chic Wedding Invitations and Stylish Celebrations | Click Here ---> TheEventEssentials.com

Back to TOP