


SUPPLIES REQUIRED
- 3/4 yd. 18" veiling
- embellishments that you desire
- Tissue Paper
- Steam Iron
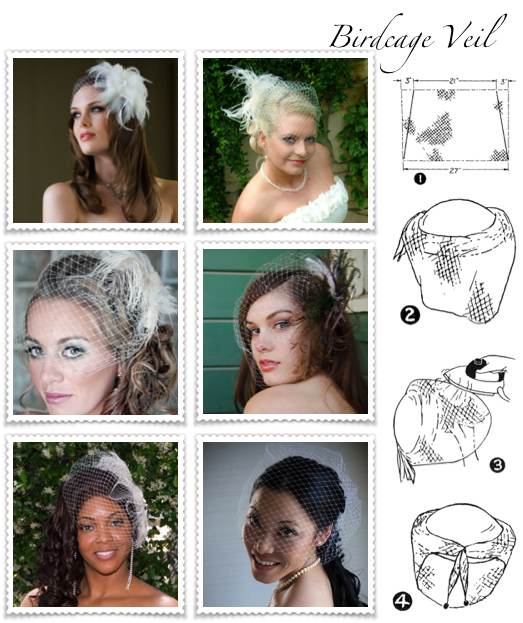
1.} Gather ends of veiling together, starting 3" from each end at top of veil and slant shirring to other end of veil.
2.} Bottom of veil will be 27" and top of veil will be 21". Gather top of veil to fit around front of crown and adjust ends of veil on hat and tack
3.} Crush tissue paper up under front of veil and pass through steam, pushing paper against veil as you steam
4.} For a veil with tab ends, use 1 1/4 to 1 1/2 yds. of veiling. After veil is adjusted on hat, gather in ends of veil and sew beads, buttons, rhinestones, feathers or some other trim to veil ends, lapping veil ends at back of hat.
Don't want to DIY? Order one from one of these great sites:
Etsy Shop: Brenda's Bridal Veils
Information found on vintagesewing.info through aisledash.com
Photos from UnveiledBridalDesigns.com {Thank You!!}
No comments:
Post a Comment