


{As Seen on StyleMePretty.com}
How to make the Placecard Tree…
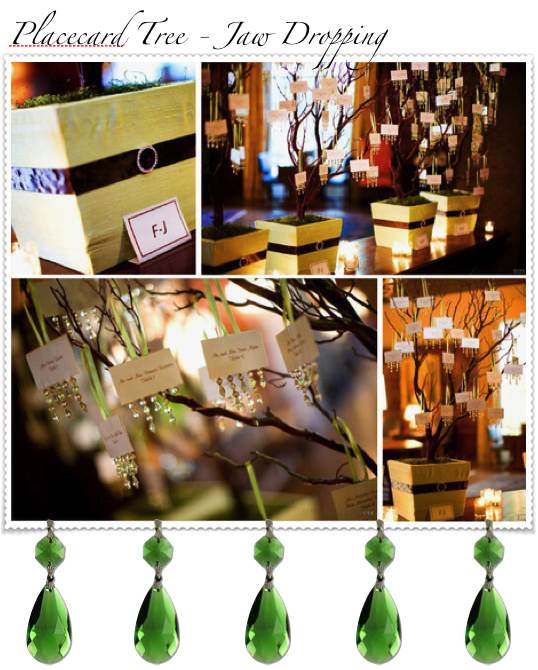
For the placecards:
I used Stardream metallic cover stock in quartz that I purchased from Paper-Papers.com. I designed a simple layout on MS Word, and used the font Murray Hill to write each person’s name on the placecard. I then printed them on a Dell Laser printer (printing on Stardream cover stock can be tricky!). I made them so they would fold over, so we could glue the fringe and ribbon inside without it looking ugly on the back.
I used a bone folder to fold my printed placecards in half, so I could cut two slits in the top folded area, to slip my ribbon through and glued it to the inside of the card. I used beaded fringe for the dangling crystals, it was easier to work with than individual crystals and you couldn’t tell once you glued it inside. It looked like this but I purchased it at Home Fabrics in Downtown Los Angeles. I cut the fringe so it had 5 crystals and then glued it to the inside bottom and then pressed the folded placecard shut to hold the fringe in place.
For the actual trees:
We bought manzanita branches at a place called Wasabi Green in downtown LA, but I know you can order them online at: Nettletonhollow.com
We created some bases out of wood, in a trapezoid shape, which we then covered with the light shantung fabric, adding the fabric was a little hard, we started off by using fabric glue and then also cutting and sewing parts of it, so that the ends would sit taut on the trapezoidal base. We the glued on a 1 1/2 inch brown satin ribbon and the rhinestone buckle. We secured the branches in the tree with expanding foam and anchored them with some heavier rocks, so they wouldn’t topple over. We then covered the top of all that mess with some moss so it would look pretty on top.
No comments:
Post a Comment