1.)
Setting the ToneSet the tone of your green wedding by choosing an eco-friendly location. If an outdoor wedding is up your alley, choose a location that will show off the beauty of the environment. If you prefer an indoor location, check out local museums or art galleries that will donate your deposit to a good cause.
2.)
Choose Eco-Friendly RingsWhen it comes to choosing a ring, make sure to use jewelers that are green-friendly. More and more, jewelers are using recycled gold and fair-labor gemstones. To make sure you are not purchasing a "blood diamond," ask your jeweler about the origin of the stone.
3.)
Use Local VendorsChoosing area vendors is a great way to keep the transportation emissions low and support your local economy. If you are interested in using a green wedding planner, check your local listings -- they're popping up all over the country.
4.)
Re-Use a Wedding DressThough your wedding dress may be your most treasured item of your wedding, there are many ways you can be eco-friendly when it comes to choosing a dress. First is the age-old tradition of wearing your mother or grandmother's dress. Take it to a local seamstress to transform it into your own special dress. If you can't imaging wearing your mom's gown, check out charities such as Brides Against Breast Cancer, where you can buy or donate a dress. All proceeds go to support women with breast cancer.
5.)
Photography: Go DigitalEven though most photographers are using digital cameras, it's a must for a green wedding. Digital photos don't use the harsh chemicals, wasted paper, and rolls of film that film photography does. Another plus is you get to choose exactly what images you want printed. Ask your photographer if they allow you to keep the digital images after the wedding is complete, then you can save a digital album of your big day
6.)
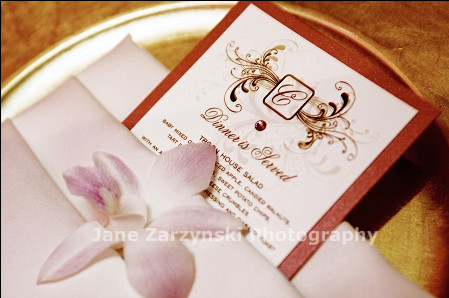
Use Recycled PaperUsing recycled paper is an easy way to create green invitations or programs. Ask your vendors if they can print on recycled paper or recycle the leftover scraps. We love the eco-friendly invitations of Tasha Rae Designs. Her theory: "Who said recycled invitations can't be beautiful?" Her invites are just that, beautiful! For an alternative to cut back on paper, create a wedding Web site where your guests can print off directions, reply, and find out hotel information.
7.)
Home-Grown FlowersFor your flowers, choose a local organic florist to arrange your centerpieces and bouquets. For a summer wedding, use farmers' market finds to create bouquet and table arrangements, or use potted plants which can be given away to your attendants at the end of your big day.
8.)
Choose an Organic MenuAsk your caterers if they can provide vegetarian and organic entrees. Also consider what you are dining on. If your location doesn't provide dishes, consider renting them to avoid using disposable plates.
9.)
FavorsInstead of favors, let your guests know that you have donated a specified amount per guest toward your favorite environmental organization. Check out www.idofoundation.org, where you can register to raise money for your favorite organization.
10.)
A Green HoneymoonWhen you're planning your honeymoon, keep in mind the practice of ecotourism, which is defined by The International Ecotourism Society as "responsible travel to natural areas that conserves the environment and improves the well-being of local people." Check out their Web site for ideas and sources to plan an eco-friendly honeymoon.
10 Tips to Plan an Eco-Friendly Wedding - article found on BHG.com