


- 12 x 12-inch sheet of scrapbook paper
- Pinking shears
- Crafts glue
- 8-inch length each of 1-5/8-inch-wide white and colored crepe paper
- Decorative-edge scissors
- Sewing thread and needle
- 16-inch length of 1-1/2-inch-wide satin ribbon
- 1/4-inch hole punch
- 1 45-inch length each of three shades of silk ribbon
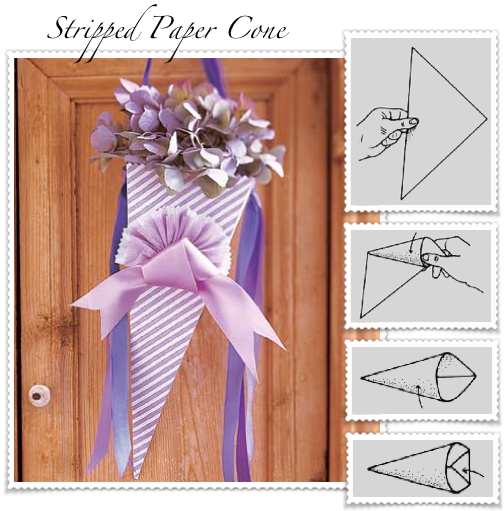
1.} Use a pencil to draw a curved line on the wrong side of the scrapbook paper from the top right corner to the bottom left corner. Make a mark on the curved line every 3-3/4 inches. Use the pinking shears to cut a straight line from the corners to the nearest mark and from mark to mark. Fold from each mark to the bottom corner of the paper. Overlap the small section with the section from the opposite edge of the cone; glue.
2.} Using decorative-edge scissors, trim one long edge of the white crepe paper, and trim 1/4 inch from one long edge of the colored crepe paper. Layer the crepe paper lengths and sew them together into a fan shape. Glue to the front of the cone.
3.} Tie a loose knot in the center of the satin ribbon. Trim each ribbon end into a V. Glue the knot to the bottom edge of the crepe paper.
4.} Punch a hole into each side of the cone. Insert the ends of each silk ribbon length through the holes. Tie a knot to secure the ribbon ends on the outside of the cone.
No comments:
Post a Comment